Access Control
Origen offers a robust system for managing content visibility and control on a Origen site. This system involves two main aspects: determining the users who can access the content and specifying the actions they can perform.
The user access aspect is configured through the Users component options, utilizing User Groups and Access Levels. User Groups help define the categories of users, while Access Levels determine the level of access granted to each group.
On the other hand, the control over content manipulation is established through Action Permissions. These permissions can be set globally in the Global Configuration settings or specific to individual components or items. For instance, the default values set in Global Permissions can be overridden in Articles Permissions, and further customization can be achieved by adjusting the permissions for individual articles.
This flexible setup allows administrators to finely tune access and manipulation permissions at different levels, ensuring that the right users have the appropriate privileges to view and interact with the content on the Origen site.
User Groups
User Groups in Origen are utilized to categorize site users based on their roles and responsibilities. These groups help establish varying levels of permissions and access rights for different user categories.
For instance, the Author user group is assigned to users who have specific permissions such as logging into the site, creating articles, and editing their own articles. However, they do not have access to other functionalities beyond these assigned tasks.
On the other hand, the Super Users group comprises individuals with comprehensive responsibilities for managing and operating all aspects of the site. These users have extensive privileges and control over the site's functionalities.
By default, Origen provides nine predefined user groups, each with its own set of permissions. However, if the need arises, administrators have the ability to create additional user groups tailored to the specific requirements of their site.
This flexible user group system empowers administrators to assign appropriate responsibilities and permissions to different categories of users, ensuring efficient management and operation of the Origen site.
The default user groups in Origen are structured with parent-child relationships to avoid redundant permission settings. This approach minimizes the need for duplicating permissions across multiple groups. Here are some examples of how inheritance works:
- Members of the Registered group do not have the Administrator Login permission. Similarly, the Editor and Publisher groups also lack this permission.
- The Author group has permissions to create and edit their own content. The Editor and Publisher groups inherit these permissions, but they also possess additional privileges.
If necessary, you have the flexibility to create new user groups to serve specific purposes. For instance, you might want to establish a group with Administrator Login permission but limited access to a particular component. Towards the end of this tutorial, you will find an illustration of such a custom user group.
By leveraging the hierarchical structure of user groups and inheritance of permissions, Origen enables administrators to efficiently manage user access and permissions, reducing the need for repetitive configuration tasks.
Access Levels
When creating objects like articles, modules, or menu items in Origen, you will come across an Access field typically located in the right column of the data entry form. This field presents a dropdown list of options including Public, Guest, Registered, Special, and Super Users. By default, the access level is set to Public.
To provide further clarity, the default viewing access levels are displayed in the screenshot below:
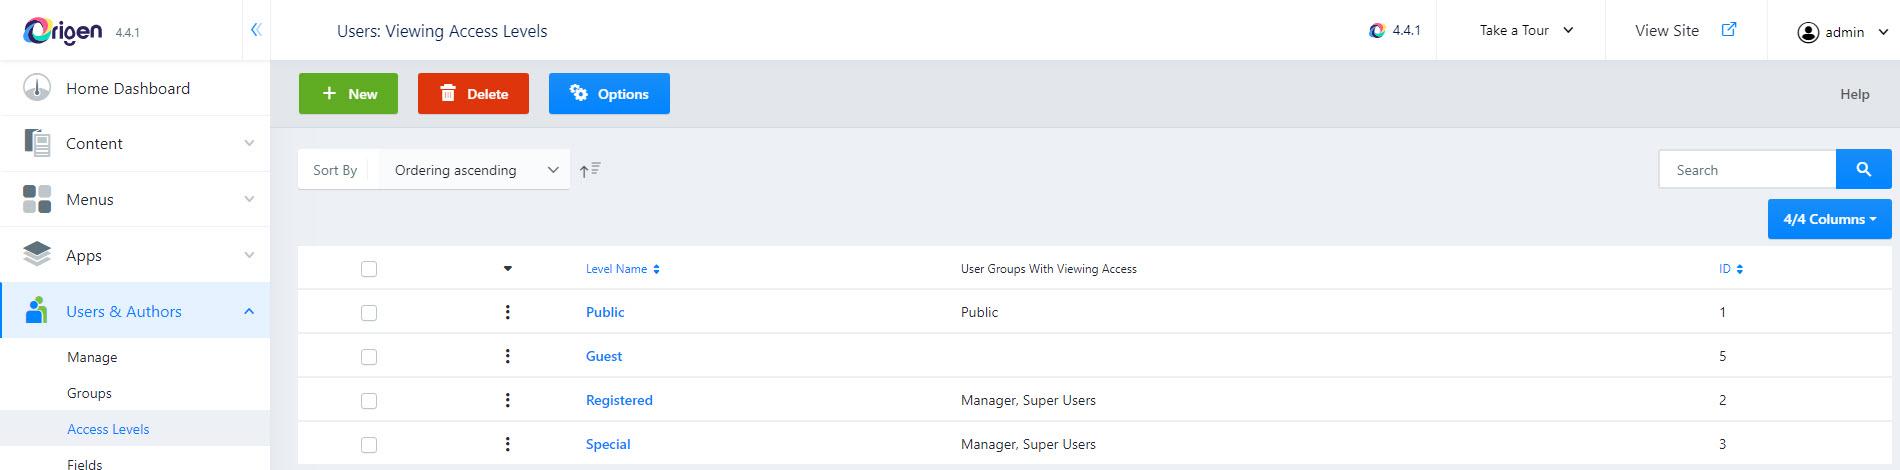
This Access field allows administrators to define the visibility and accessibility of the created objects to different user groups, ensuring that content is displayed appropriately based on the specified access levels.
Here are the revised examples:
- If you create a site module and set the Access to "Registered," it will only be visible to users who are logged in to the site. This ensures that the module's content is restricted to registered users and remains hidden from public visitors.
- If you create a site menu item and set the Access to "Super Users," it will only be visible to logged-in Super Users. This access restriction ensures that the menu item is exclusively displayed to users with Super User privileges, providing them with access to specific functionality or content.
Permissions
The Global Configuration Permissions serve as the initial foundation for configuring permissions in Origen. These permissions act as a starting point from which other components or individual items can inherit or override their own permission settings. To provide a visual representation, a screenshot is available to illustrate the Global Configuration Permissions interface.
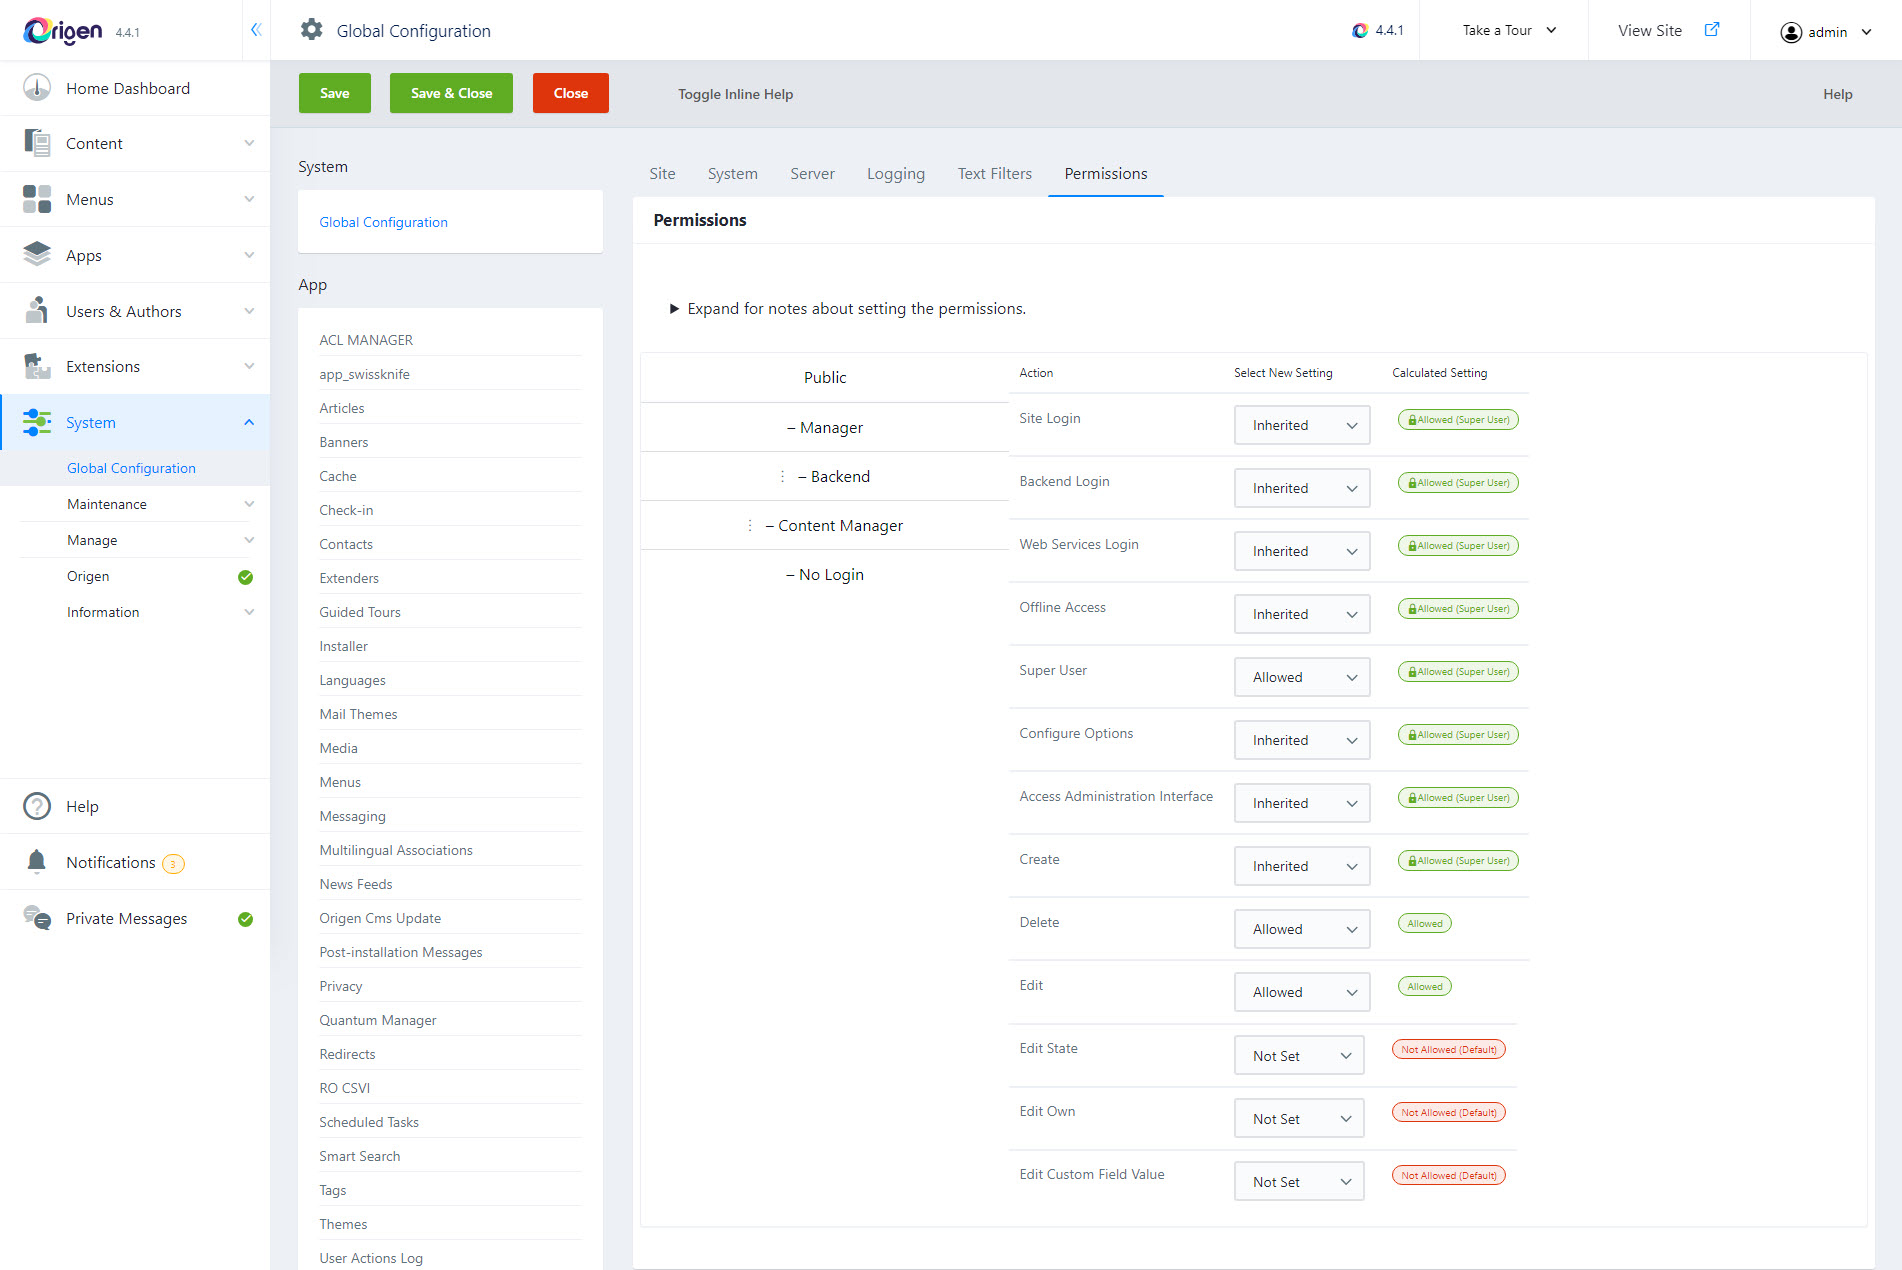
By examining the provided screenshot, it becomes evident that members belonging to the Public group lack permission to perform any actions. When you navigate through each group, you will observe the permissions changing accordingly. Notably, the Manager and Administrator groups have the privilege of Administrator Login, while the Author, Editor, and Publisher groups do not possess this capability. It is worth mentioning that the latter groups are essentially associated with Site roles rather than Administrator roles.
All group permissions derive from the Public group, which itself lacks permissions for any actions. However, it is important to note that items within the Public group are viewable by default. As a result, assigning Public permission to an item allows it to be visible to all site visitors, irrespective of whether they are logged in or not.
Articles Permissions
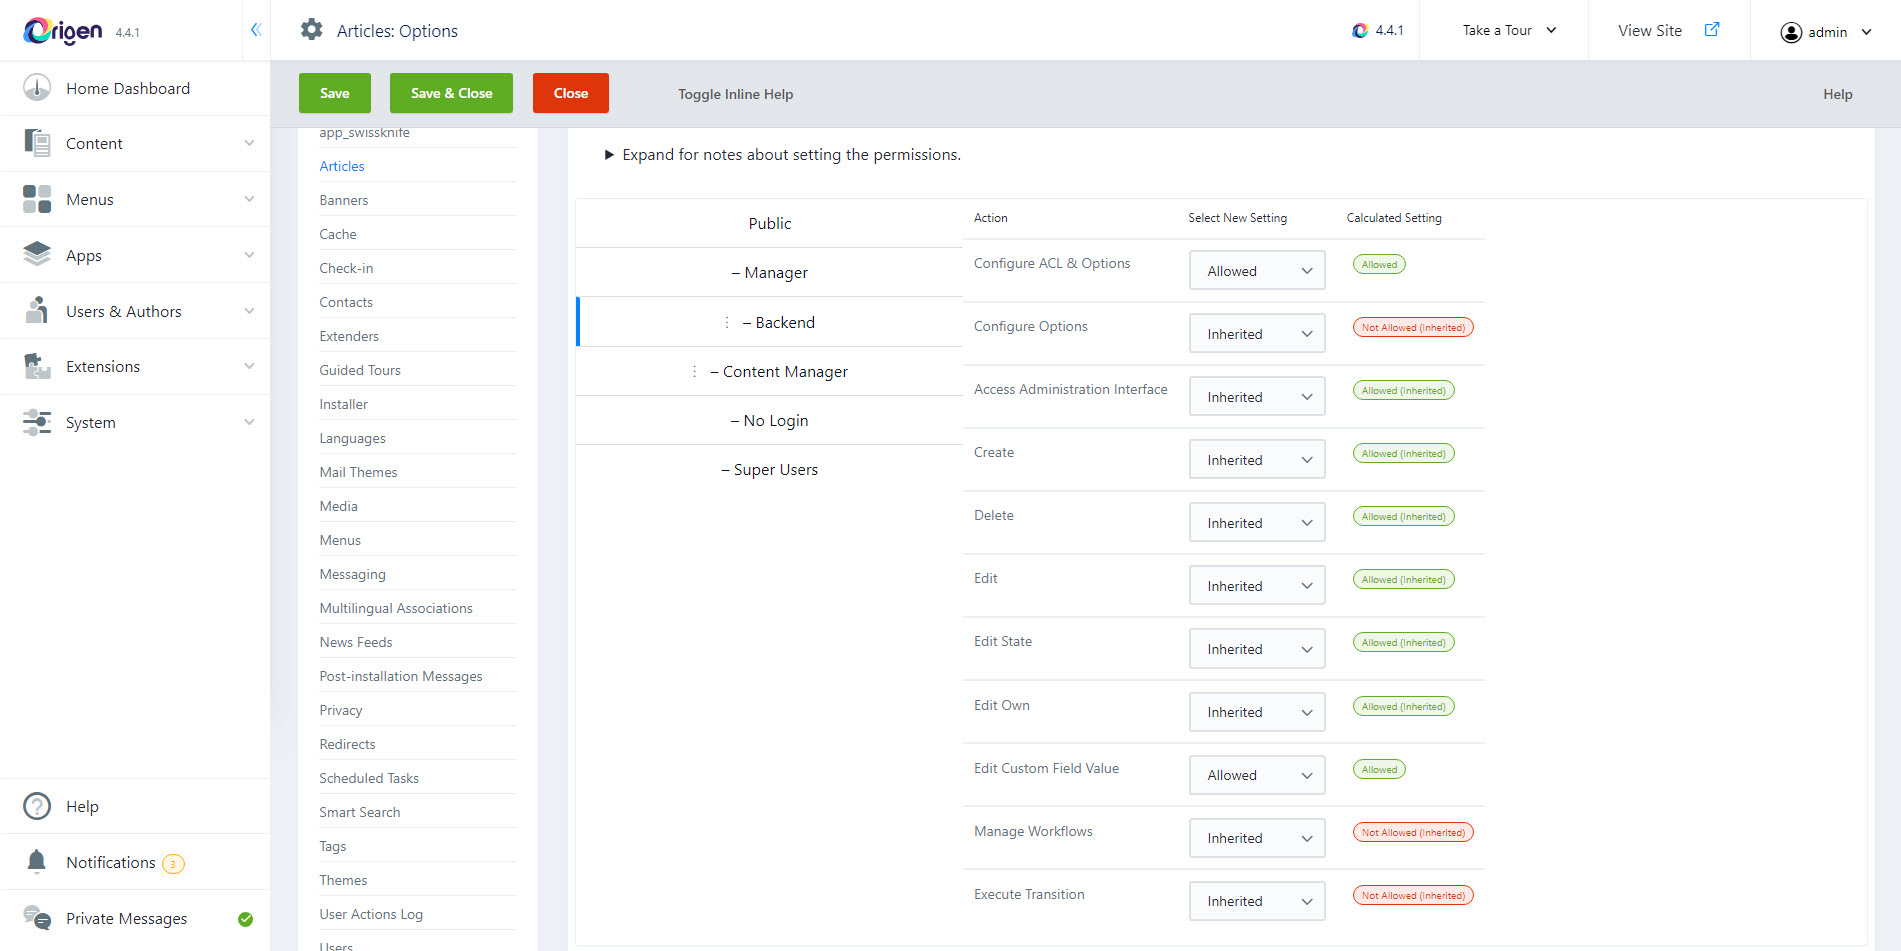
The actions available in Articles Permissions diverge from those in Global Configuration Permissions. In Articles Permissions, you will not find items associated with login, but instead, you will encounter items linked to workflows. This pattern is quite common, where a component's permissions are tailored to the specific functionalities of that component, while permissions for component items, such as articles, are focused on governing actions related to those individual items.
Single Content Permissions
The single article permissions encompass only three specific items: Delete, Edit, and Edit State.
Access Control Example: Special Purpose User
Let's consider a scenario where you require the creation of a User Group intended for users with a single responsibility, such as an Article Administrator. Members of this group should be granted Administrator Login permission while having limited visibility restricted to Content items exclusively. Here is the procedure to follow in order to achieve this:
- Start by creating a new User Group specifically for Article Administrators.
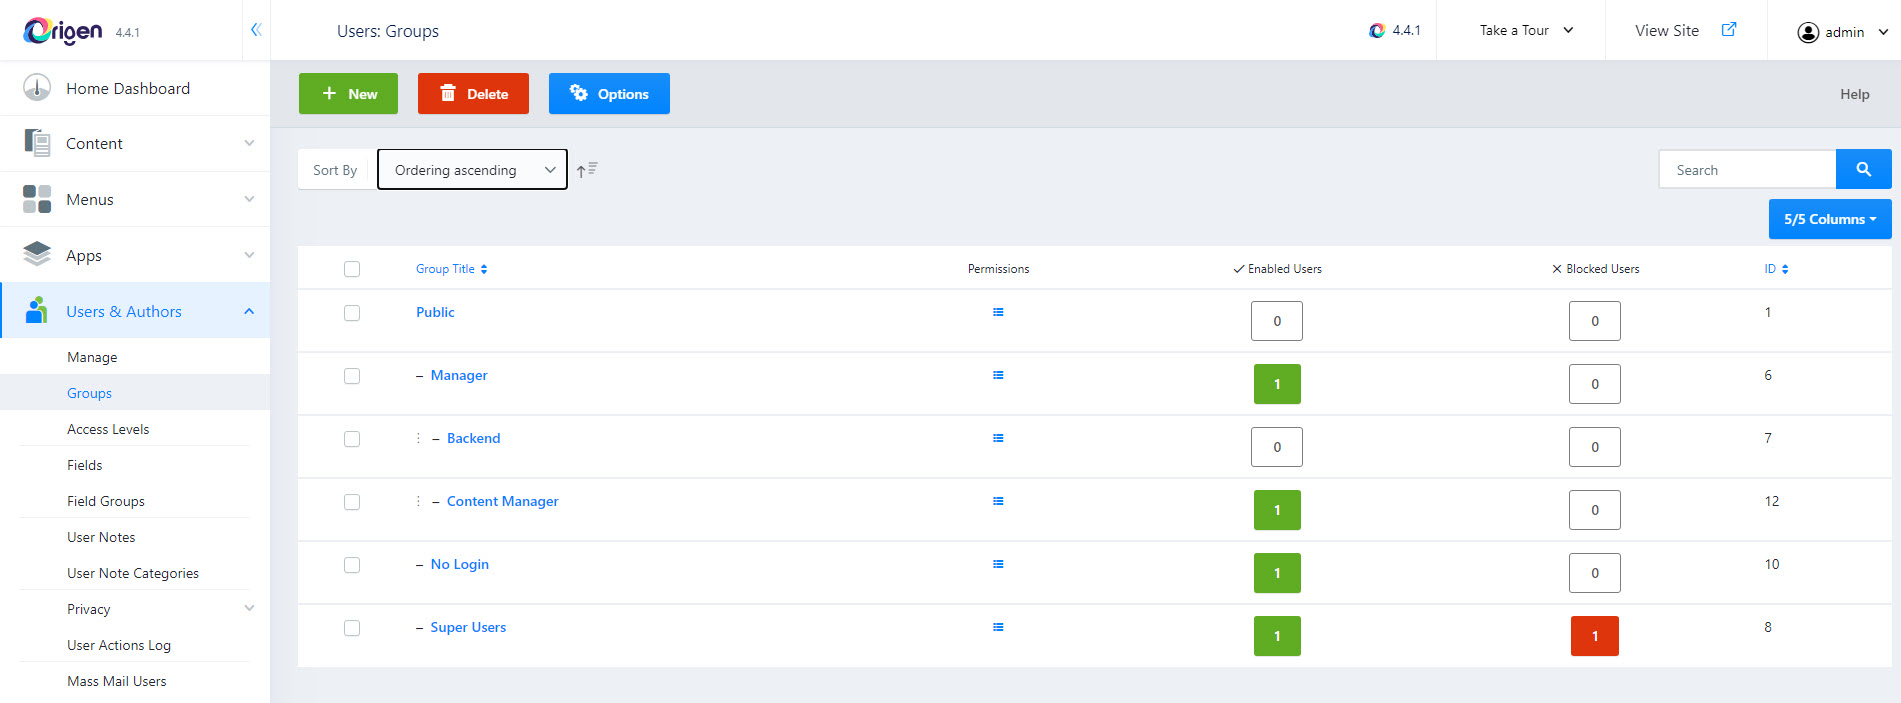
- Access the Origen Administrator menu and navigate to "Users" → "Groups".
- Click on the "New" button in the Toolbar to create a new User Group.
- Provide a suitable Group Title, such as "Content Admin".
- Set the Group Parent as "Public" since it has no permissions for other areas.
- Save the changes made.
By following these steps, you will have successfully created a User Group tailored for Article Administrators, granting them the necessary Administrator Login permission while restricting their visibility to Content items only.
Create a new User Group
To accomplish the task at hand, please follow these steps:
- Access the Administrator menu and navigate to "Users" → "Groups".
- Click on the Toolbar's "New" button.
- Complete the Group Title field with the name "Content Admin".
- Ensure that the Group Parent is set to "Public" since it does not possess any permissions.
By adhering to these instructions, you will be able to create a new group named "Content Admin" within the "Users" section of the Administrator menu. The newly created group will have "Public" as its parent group, devoid of any permissions.

Assign to Special
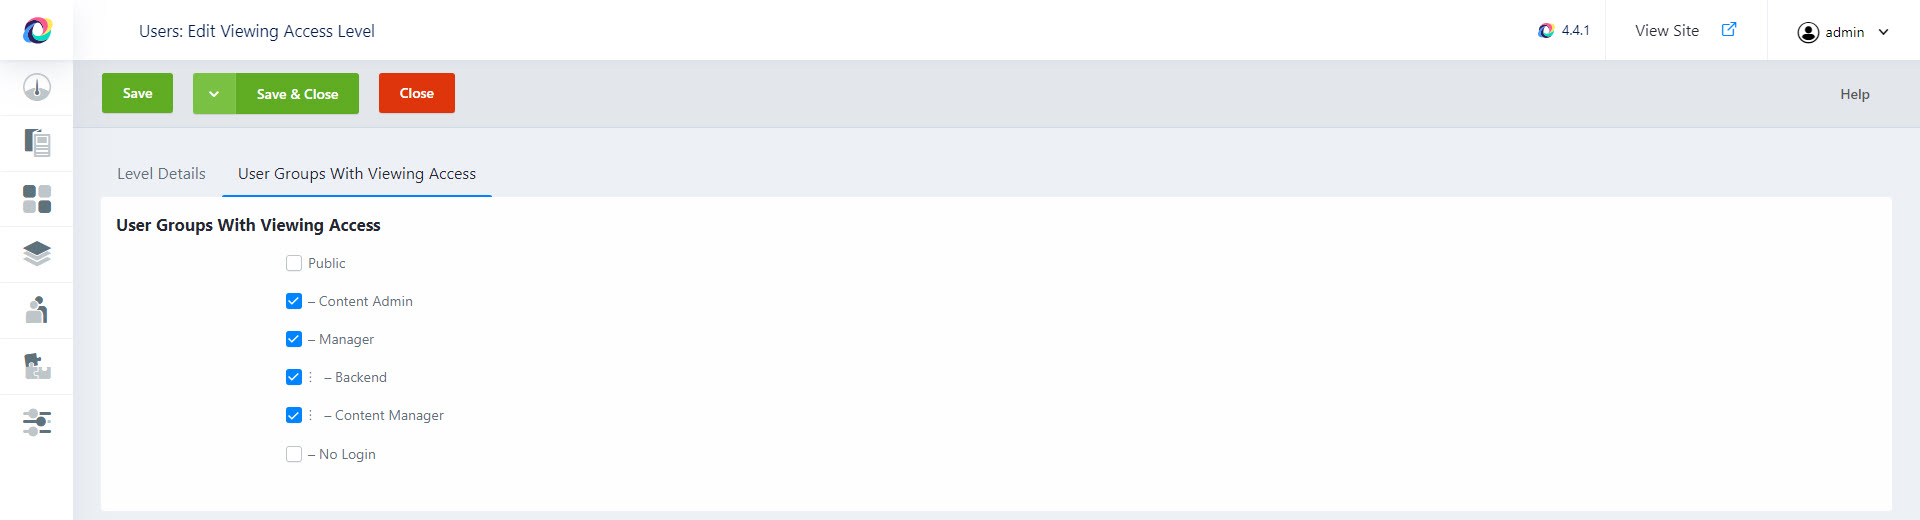
- Access the Administrator menu and navigate to "Users" → "Access Levels".
- Locate and select the "Special" item.
- In the "Users: Edit Viewing Access Level" form, check the checkbox next to "Content Admin".
- Click on the "Save & Close" button to save the changes.
By following these instructions, you will successfully select the "Special" item within the "Users" section of the Administrator menu. Then, you can assign the "Content Admin" access level by checking the corresponding checkbox in the "Users: Edit Viewing Access Level" form. Finally, save the changes by clicking on the "Save & Close" button.
Global Configuration Permissions
Access the Administrator menu and navigate to "Home Dashboard" → "Global Configuration". Click on the "Permissions" tab. Locate and select the "Content Admin" group
Articles Options Permissions
To carry out the necessary actions, please follow these steps:
- Access the Administrator menu and navigate to "Content" → "Articles".
- Click on the "Options" button located in the Toolbar.
- Switch to the "Permissions" tab.
- Locate and select the "Content Admin" group from the available options.
- Set all items, except for the first two ("Configure ACL & Options" and "Configure Options Only"), to "Allowed".
- Finally, click on the "Save & Close" button to save your changes.
By following these instructions, you will be able to access the "Articles" section within the "Content" menu of the Administrator interface. From there, click on the "Options" button to access the article-specific options. Switch to the "Permissions" tab and select the "Content Admin" group. Adjust the permissions for all items, except the first two, to "Allowed". Save your changes by clicking on "Save & Close".
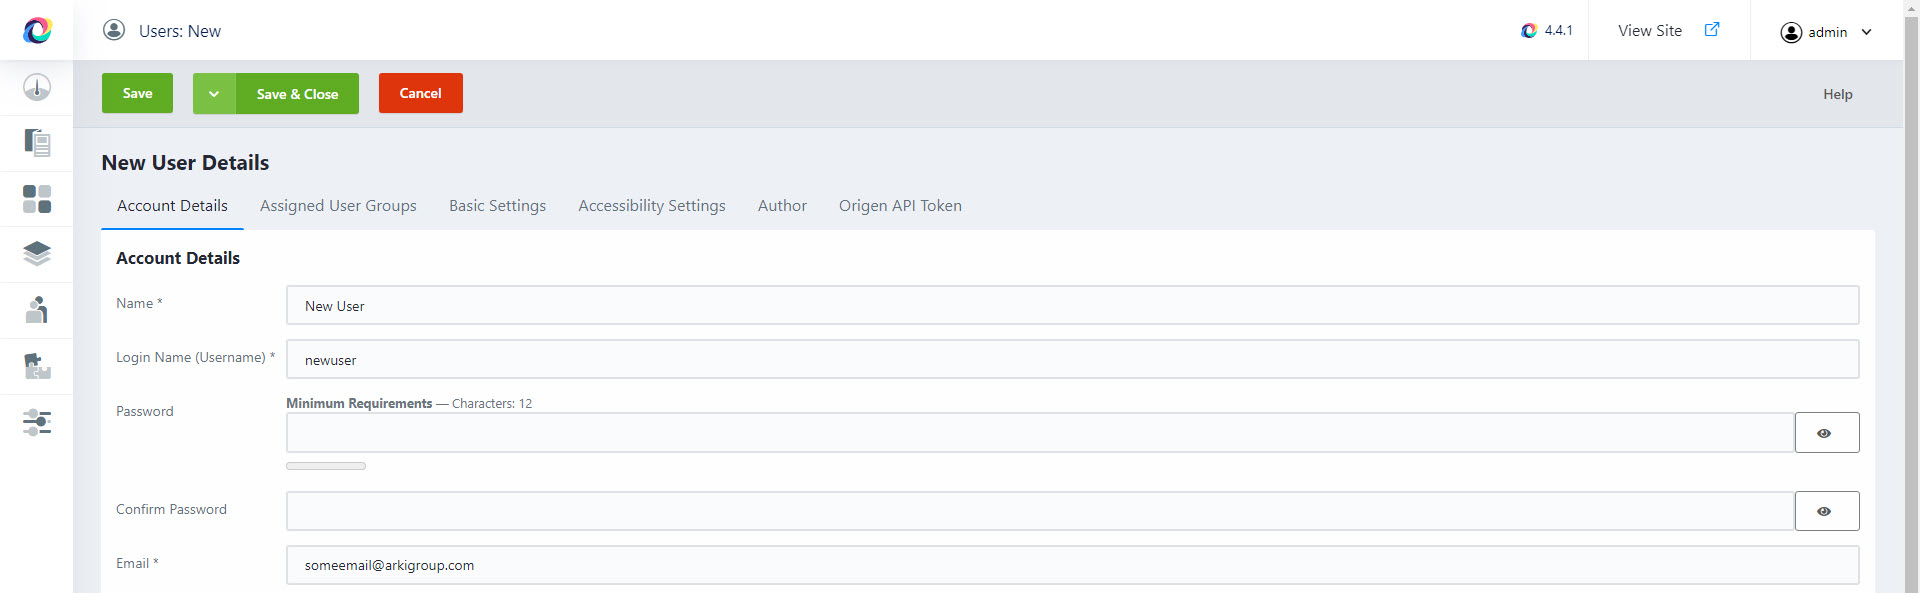
Create or Edit User
- Create a new user or edit an existing user who is currently not assigned to any groups.
- Access the User edit form and navigate to the "Assigned User Groups" tab.
- Select "Content Admin" from the available options in the tab.
- Save the changes and close the form.
- Log in using the credentials of a user who belongs solely to the "Content Admin" Group.
- Upon successful login, the menu should display only article-related items, tailored to the permissions granted to users in the "Content Admin" Group.
By following these instructions, you will be able to create or edit a user, assign them to the "Content Admin" Group, and subsequently log in as that user. This will ensure that the menu displays exclusively article-related items, reflecting the permissions associated with the "Content Admin" Group.